- Published on
Using a cheap STM32 Nucleo to teach remote sensor monitoring
- Authors
- Name
- Vittorio Zaccaria
- @vzaccaria_en


One of the major struggles as a University professor is to create compelling examples for introductory courses to computer science. You either end up with sterile toys, or bigger but hardly reusable examples.
Part of my students are enrolled in the Energetic Engineering track, so I thought that it would be great to show them an example of embedded system in that application domain.
In this small post, I'll sum up how I've built an embedded system for temperature monitoring that sends data to an online plotting service Plot.ly.
The STM32 Nucleo board
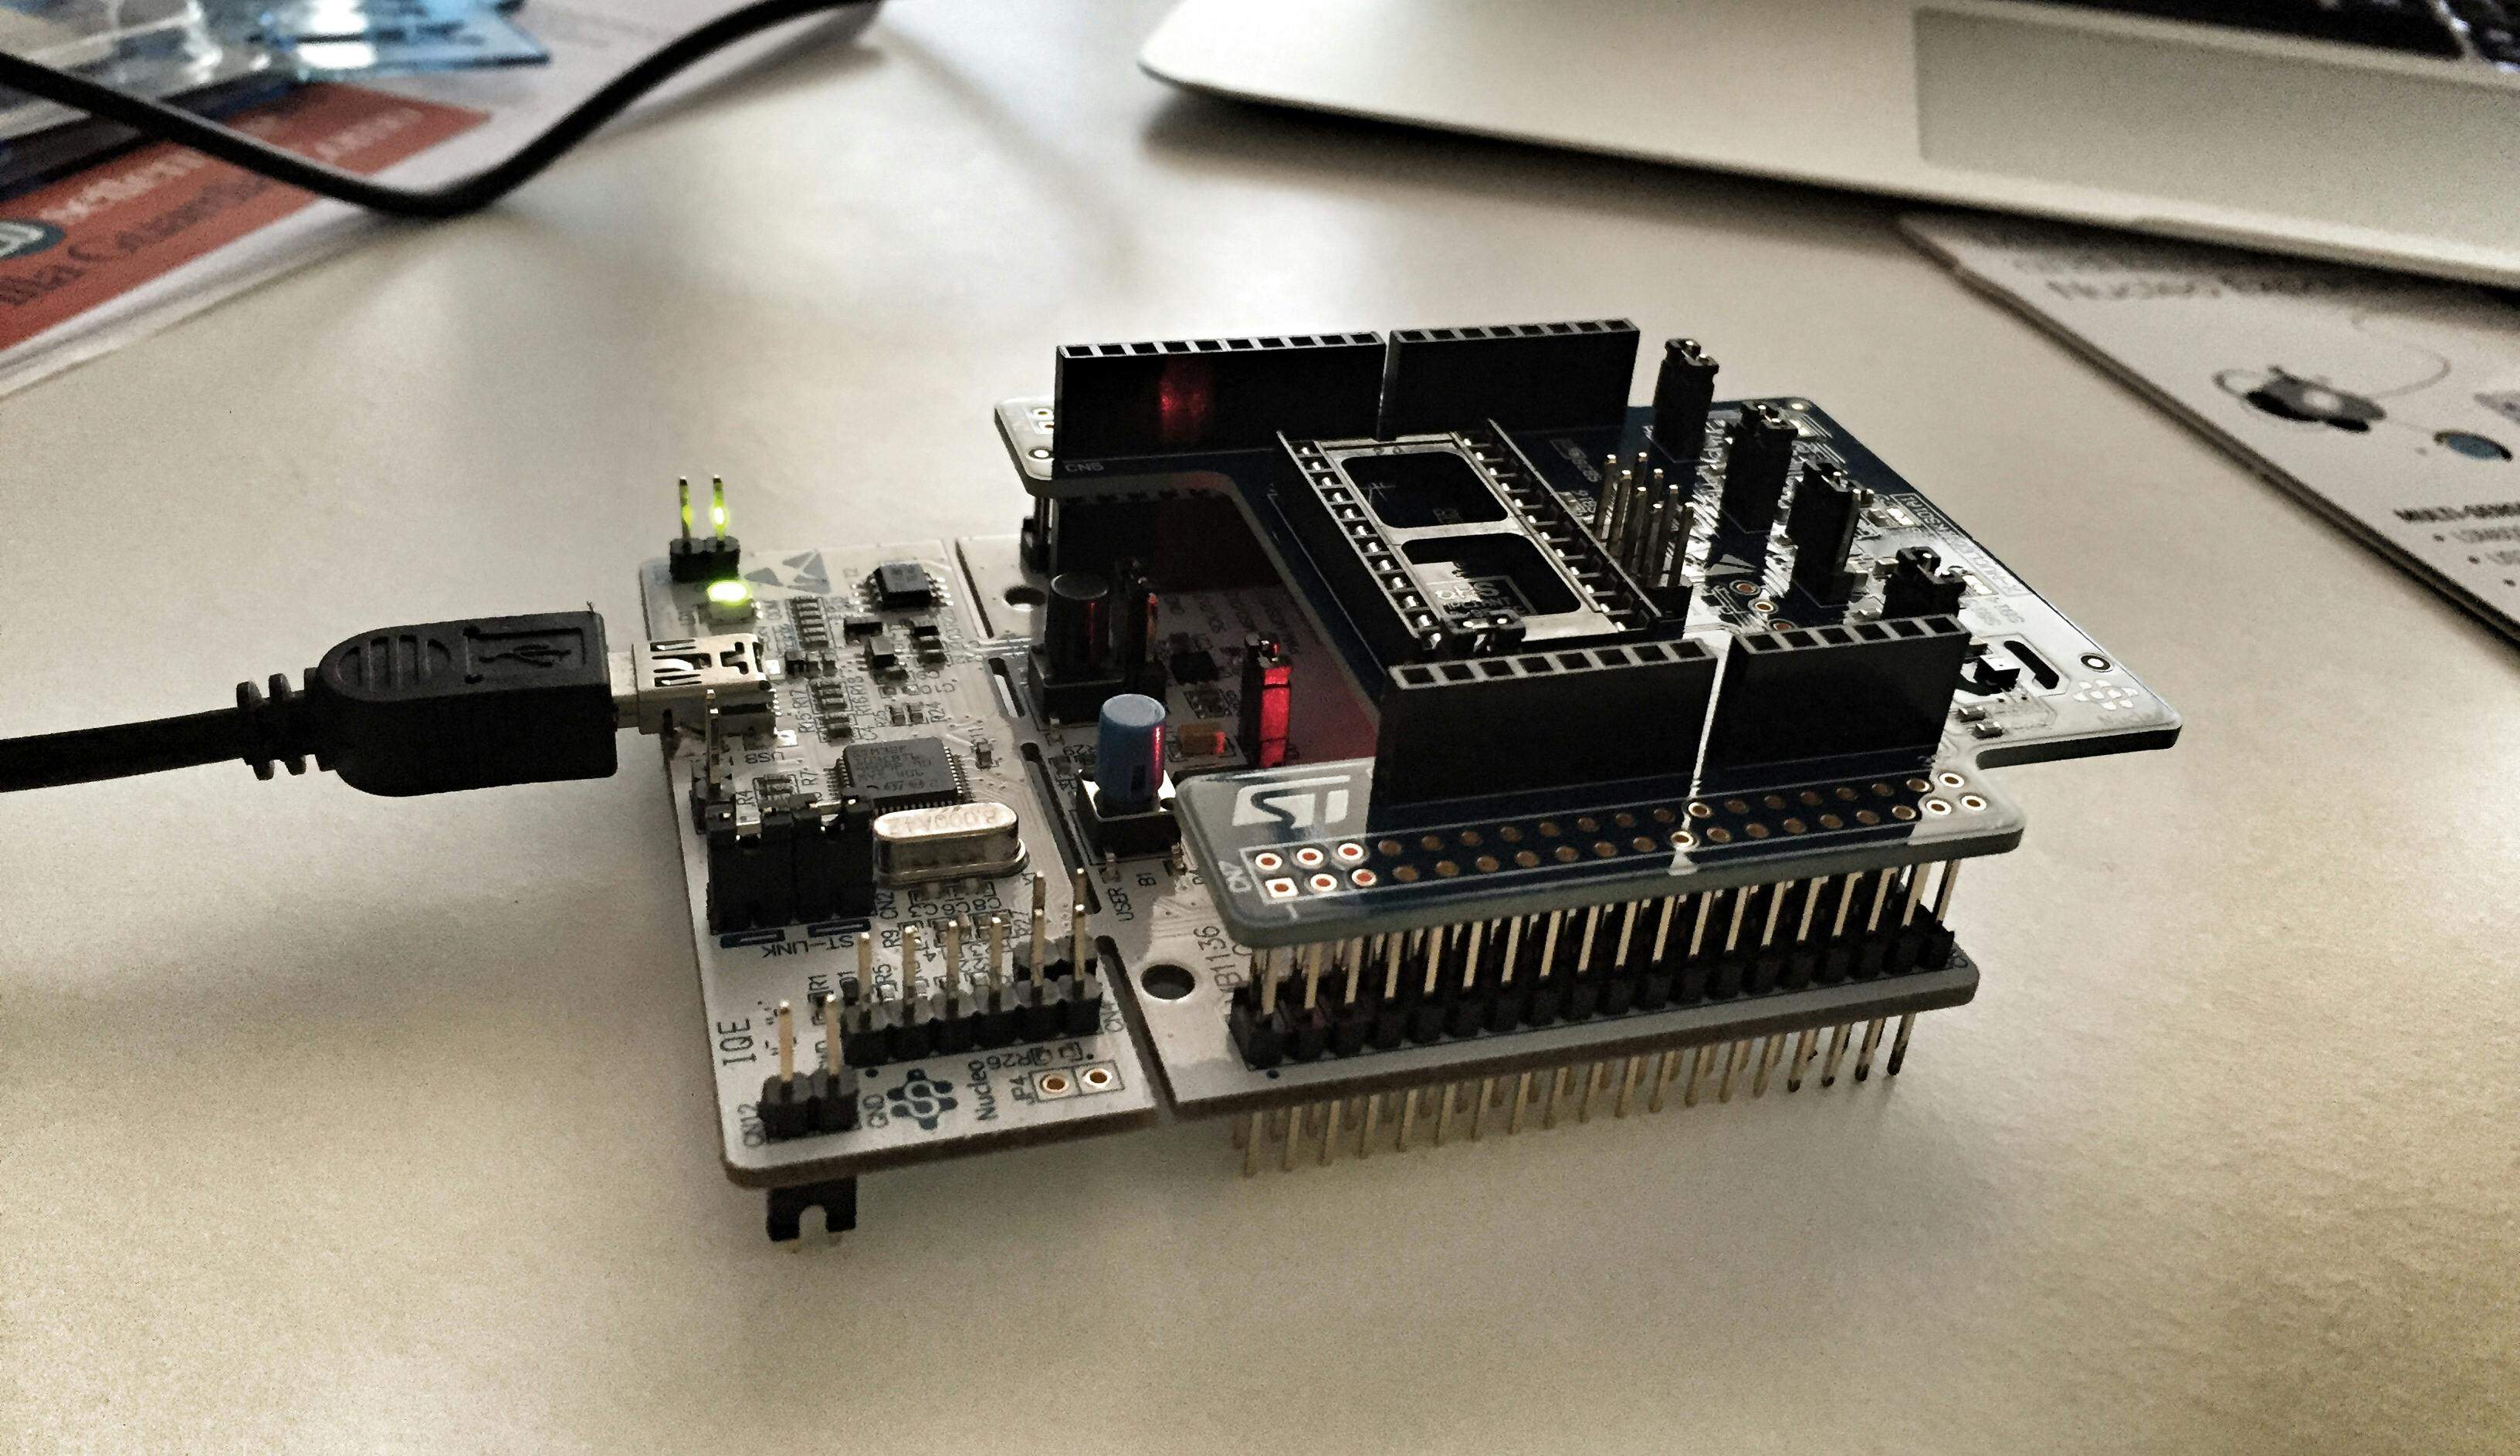
For this tutorial, I'll use an an ST Nucleo L053R8 as a main board and a X-NUCLEO-IKS01A1Motion sensor shield for measuring room temperature. For the remote connection, I am going to use the PC as a bridge, by using a small custom proxy to forward data to the remote service. As a future step, this can be substituted by a wifi shield, to make the system completely autonomous.

Both boards can be bought at Mouser for approximately $26, so they are pretty cheap, even for a student. The boards are also compatible with the Arduino eco-system so there is no risk of vendor locking, in the case you want to take this experiment a little bit further.
Interestingly, the mounted ARM Cortex M0 has only 64Kb of flash memory for programs and 8Kb of data RAM. While not necessarily the most resource constrained, this proved to be rather challenging for exchanging structured data between the Cortex and the PC.
Enough words, gimme the code
Those impatient can checkout the source code used in this tutorial from GitHub - see the example2 directory.
Just cd into one of the example* directories; then, with the board attached run platform run.
Architecture
The whole build system is based on Platform IO, a very interesting project that allows to setup, build and execute embedded programs by downloading, on demand, the appropriate toolchain for an ever growing set of boards.
PlatformIO is built on Python so it is suggested to create a virtual env before the installation:
virtualenv env
source ./env/bin/activate h
python -c "$(curl -fsSL https://raw.githubusercontent.com/platformio/platformio/master/scripts/get-platformio.py)"
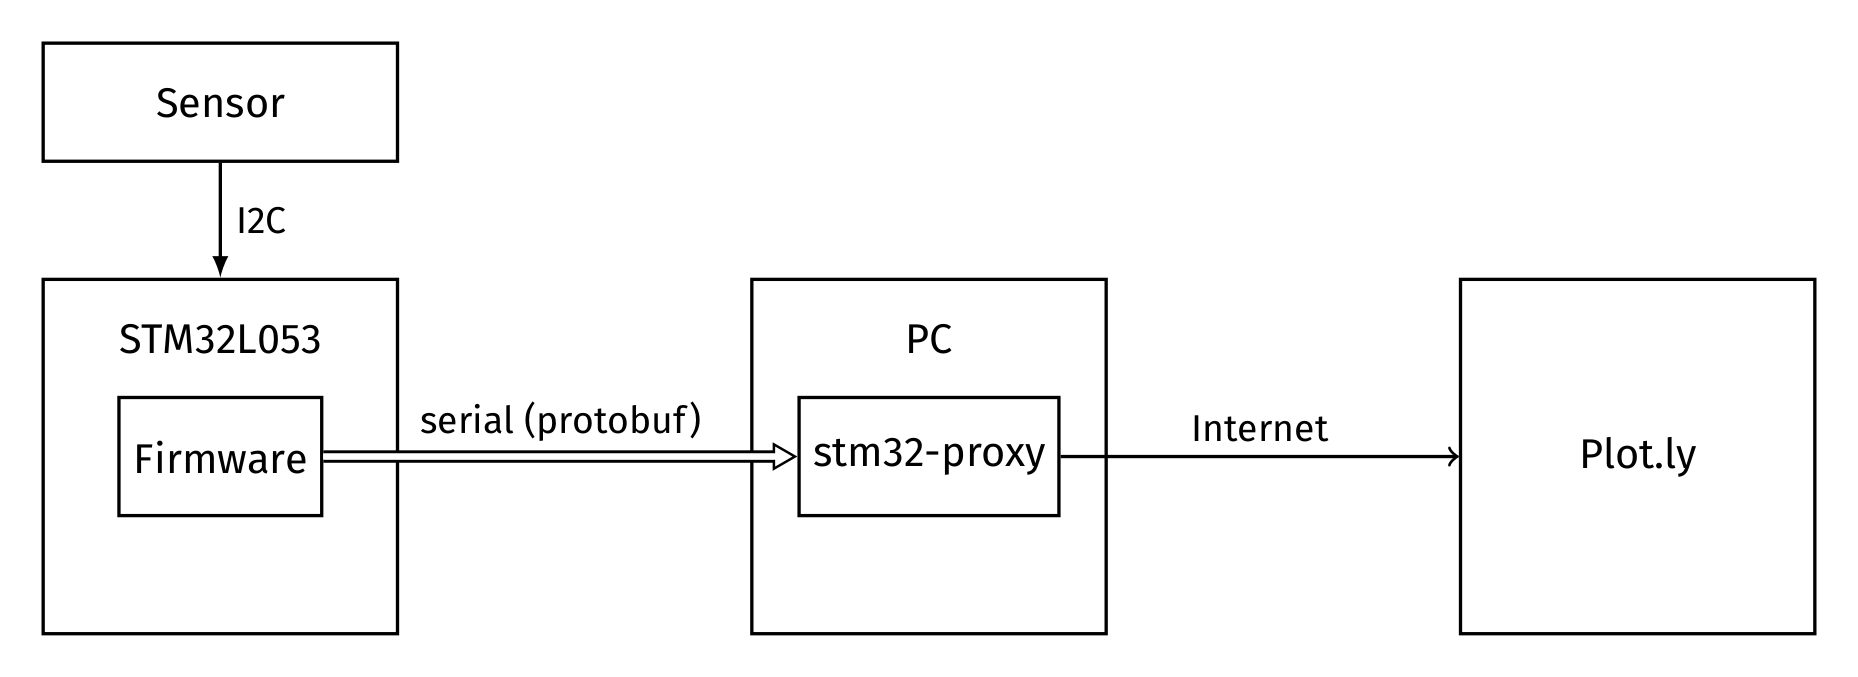
The sensor shield is connected to the STM32 through a synchronous serial interface (I2C). We are going to write a small firmware that sends temperature data through the serial interface to the plotly.
Ideally, we would send HTTP packets directly from the STM32 by relying on a simple proxy-server; however, given the technical limitations of the board we cannot afford any useful communication library. In fact, I even tried compiling picojson but I ran out of space on the flash memory.
So I turned out to slightly different solution: using Google's protobuf over the serial interface and relaying packets through a Nodejs proxy.

Protobuf
Protobuf is basically a nifty DSL to:
easily write and read your structured data to and from a variety of data streams and using a variety of languages.
In our case, the prototype definition of the packet we want to send is described by the following protobuf .proto file:
message pct {
    required float temp_value_C = 1;
    required float hum_value = 2;
    required float pressure_value = 3;
    }
where each field is required and has a different numeric tag. These tags are used to identify your fields in the message binary format, and preserve the field's meanings over the evolution of your protocol.
Generating a suitable C serialization function is just as simple as:
protoc-c --c_out=src proto/message.proto
After that, you'll find both a header and a function definition file to be included in your project. The following generated macros and functions are the one that we will use the most:
/* Default initialization literal for our packets */
#define PCT__INIT \
 { PROTOBUF_C_MESSAGE_INIT (&pct__descriptor) \
 , 0, 0, 0 }


/* Packs a Pct message into a generic byte buffer (out) */
size_t pct__pack (const Pct   *message,
                  uint8_t     *out);

/* As a means to synchronize the de-serialization, we need to
send packet size beforehand */
size_t pct__get_packed_size (const Pct   *message);
The Nodejs Proxy
For proxy-ing the requests coming from the USB we are going to use stm32-proxy, a super-simple POST request proxy for micro-controllers. You can get it from NPM:
npm install stm32-proxy
The program parses a stream of packets specified by a PROTO file through javascript plugin:
    Usage:
        stm32-proxy PROTO [ -p PORT ] [ -g PLUGIN ]
        stm32-proxy ( -h | --help )

    Options:
        -h, --help              help for stm32-proxy
        -p, --port PORT         port to use to connect to the stm32
        -g, --plugin PLUGIN     javascript plugin (implements init() and process(data))


    Arguments:
        PROTO                   prototype file
In our case, we are going to post-process packets through a plotly-stm32-proxy-plugin.js which contains all the logic for sending packets to our plotly account, by using the Plotly Nodejs package. Basically, all the proxy plugins should specify an init function (for setting up the connectivity at the beginning) and a process(packet) function that is invoked for each packet.
In our case, process sends packets to the Plotly stream connection s as follows:
function process(m) {
  var datum = m.temp_value_C;
  var dta = {
    x: $m().format("YYYY-MM-DD HH:mm:ss.SS"),
    y: datum
  };
  var payload = JSON.stringify(dta) + "\n";
  s.write(payload);
}
The STM32 program
The firmware running on the STM32 is very simple; the main loop samples the sensors every 200ms through getSensorValues and sends the values to the stm32-proxy through the serial line (sendData):
while (true) {
    led1 = !led1;
    Pct m = PCT__INIT;
    getSensorValues(m);
    sendData(&m);
    Thread::wait(200);
}
Before that, however, we have to initialize the sensors shield through the appropriate API. Here I am using the one exported by the 'x_cube_mems' library, which I have downloaded from the STM website.:
mems_expansion_board->hts221.Power_ON();
mems_expansion_board->hts221.HTS221_Calibration();
Getting sensor values into a Pct packet is as simple as (forgive me for the use of lambdas in , but they are so nice):
auto getSensorValues = [&](Pct &m) {
    mems_expansion_board->hts221.GetTemperature((float *)&m.temp_value_c);
    mems_expansion_board->hts221.GetHumidity((float *)&m.hum_value);
    mems_expansion_board->lps25h.GetPressure((float *)&m.pressure_value);
};
Sending data however is a bit trickier as (Google docs):
The Protocol Buffer wire format is not self-delimiting, so protocol buffer parsers cannot determine where a message ends on their own.
To be able to synchronize to the beginning of a packet, we rely on a sync [magic word](https://en.wikipedia.org/wiki/Magic_number_(programming) ('VZ') followed by the length of the packet and by the payload itself.
We encode the length of the payload m by using a 4 byte integer:
union { unsigned char bytes[4]; uint32_t value; } o32_to_bytes;
...
auto len = pct__get_packed_size(m);
...
o32_to_bytes.value = len;
pc.printf("VZ");
for(uint i=0; i<4; i++) {
    pc.printf("%c", o32_to_bytes.bytes[i]);
}
and then we send the payload m by first serializing it through the pct__pack function provided by protobuf:
uint8_t buf[PCT_BUF_SIZE];
pct__pack(m, buf);
for(uint i=0; i<len; i++) {
    pc.printf("%c", buf[i]);
}
Finally online
To start up monitoring, we first compile and install the firmware through Platformio and then launch the monitoring proxy to listen to our serial port:
platformio run
./node_modules/.bin/stm32-proxy proto/message.proto -p '/dev/cu.usbmodemfa133' -g "`pwd`/tools/plotly-stm32-proxy-plugin.js"
If you go into your Plotly homepage you should see a live plot of the data sent by your board (in this case only temperature):
